Follow Us!

Share

The Triangular Grid System: How To

By Nick Collins

This article first appeared in Haunted Attraction Magazine

If you have been Haunting for very long, chances are that you have heard of or even experienced what is known in the industry as the “Triangular Grid System.” This mysterious and sometimes controversial concept has been ridiculed by some Haunters and praised by others. Its intrigue has made it the focus of many seminars, workshops, articles and message boards throughout the industry. But what is this mysterious system? Where did it come from and why should we care?

Triangular Grid
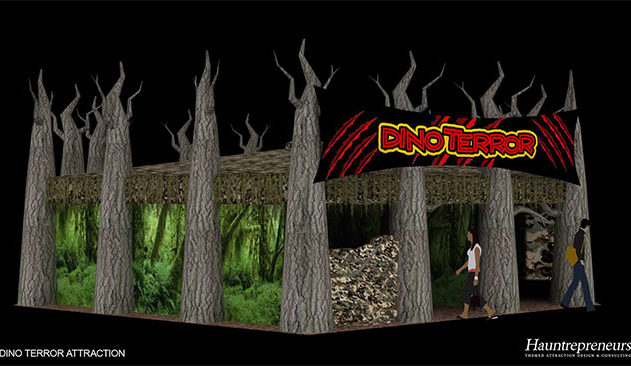
Different from the more traditional square grid corridor layout used by most Haunt designers, where all wall panels connect to each other at right angles (90 degrees), the “triangular grid” uses equilateral triangles as a template for laying out the patron pathway. Nothing more than an alternative layout to Haunted Attraction design, in a triangular grid, wall panels intersect at 120 and 60-degree angles.
The “Triangular Grid System,” on the other hand, is the combination of nominal 2” thick wall panels with built in doors/ windows and scares, angle bracket connectors, 1x bracing in the direction of the grid, and carpet underlayment. Together, these elements create a strong, comprehensive Haunt construction “system” developed over 20 plus years of industry experience.
Although it’s certainly not quantum physics, getting a grasp on how to properly design and execute the “Triangular Grid System” can be a bit confusing, but hopefully article will provide the tools you need to effectively design and install a Triangular Grid attraction.

Grids in Theory
It’s important to note that any type of grid only works “perfectly” on the drawing table, with wall panels as thin as a pencil line. In the real world, wall panels have a thickness that has to be taken into account during the design. For example, if you have grid line drawn on the floor, you have 3 options for wall placement. You can place wall on the left side of the line, the right side of the line or centered directly on top of the line. How other walls butt into this panel will change due to the thickness of the panel, and how it is placed.
Even the thickness of the 2” wall panel gets in the way of its placement on the triangular grid and creates notches and voids in the layout. If this kind of “flaw” bothers you, then the Triangular Grid System may not be for you.
The Grid On Paper
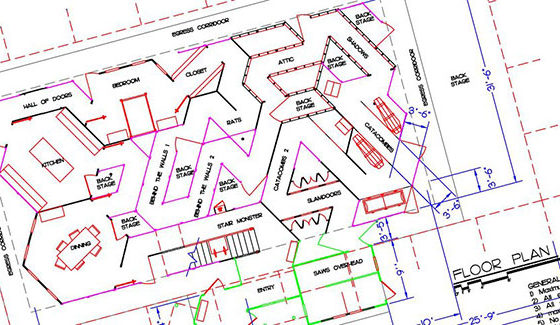
As it would be foolish to begin building a home without a plan, a Haunted Attraction needs to be well planned and drawn out before the first piece of wood is cut. Although it’s exciting to just get in there and start building, every second you spend thoroughly designing on paper will save you valuable time, energy and resources when the walls start going up.

1. Using pencil, paper, eraser and ruler or scale rule, draw a rectangle, which reflects the perimeter of available space for your Haunt.
2. Measure 4’-0” in from each wall to create an “attraction area.” This leaves a perimeter corridor around the attraction for emergency egress and actor substitution.
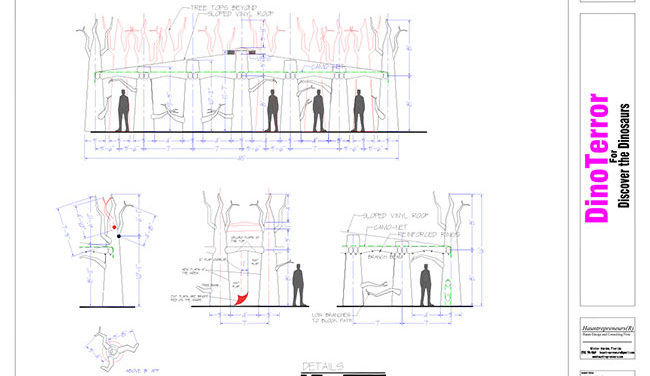
3. Parallel to the longest direction of your space, draw lines every 3’-6” on center across the attraction area. These denote the “bays” of the grid.(Figure 1)
4. On the first bay line, place a pencil “dot” 2’-0” from the corner of the area. Then make an additional dot every 4’-0” along the bay line. This step is repeated on every other line across the attraction area.
5. On the second bay line and the remaining alternating lines, start with a dot on the edge of the attraction area and continue make an additional dot every 4’-0” along the lines. These dots represent the vertexes of the triangular grid, and should be very close to 4’ apart measured across the bays.
6. Connect the dots in a diagonal direction across the 4’ distance and across the whole attraction area.
Note: You can also buy “isometric” graph paper already divided into triangles.

Designing The Pathway
Taking a lesson from Architectural design, think of developing the rooms of your attraction first. The “rooms” of a triangular grid attraction are not square due to the angles of the grid. They tend to be hexagonal, elongated hexagonal, or the shape of superman’s logo. Set the props or furniture onto the grid for that the entrance, exit and pathway through the room are functional. Then arrange the rooms in the attraction area and draw hallways to connect the rooms. You’ll notice very quickly into the design of your haunt that there tend to be “dead” triangles that do not fit in the walkway or in a room. Sometimes wasted space, these “dead” triangles can be used for security to get out of the way of patrons or to display props.
Try not to have more than three panels in a straight line in the design, as they tend to be unstable during installation and because the more twists and turns in the pathway, the better. Once you have the full layout drawn up, you are ready to transfer the drawing to full scale.

The Grid On-Site
Transferring the design to your actual haunt space is fairly easy after it has been designed on paper. To mark the grid on-site, gather an assistant, tape measures (both a 25’ and a 100’), chalk line and 1/2” masking tape. Follow the same steps as you did on paper, only now you’re marking the floor using your drawing as a “road map”. (If you are planning to use carpet underlayment for your Haunt, it must be installed first so that the grid can be marked on it.
Follow the description above, using the chalk line to mark the bay lines and small pieces of masking tape for the dots. You do not have to chalk out the diagonal lines, unless you want to. The masking tape dots are enough to copy your layout from the paper to the space. Use 1/2” masking tape to “draw” where the walls of the attraction will be located, and you are ready to start setting up the panels.

Wall Panels
The thing that makes a corridor a corridor is of course, walls! Haunt walls are typically modular panels and 4’ wide by 8’ tall (the same size as a sheet of plywood). A modular Triangular Grid System wall panel consists of a frame of 2x lumber. Sandwiched between 2 sheets of 1/4” to 1/2” plywood or OSB, (Figure 3), are two verticals (2×4 or 2×3) laid flat on the “face” of the board, rather than on the “spine” of the board like a normal wall would be framed, and a top, center and bottom member (2×4, 2×3, or 2×2) to complete the structure. The plywood faces are attached to the frame with drywall screws. The frame of the wall panel is held together only by the plywood screwed to them, the 2x members are not connected to each other directly. You can build one-sided walls but plywood gussets plates should be added at all 2x connections for strength.
Using screws only will make the panel easier to modify or repair than a panel that is assembled with nails or adhesive. The finished panel is a sturdy, double-sided wall that has a finished nominal thickness of 2”. Utilizing the same construction method, panels can also be constructed as doorways, special openings or with windows in them.
Assembly
With the walls built and painted, the next step is installation. Stand two of the panels on taped lines at a 120-degree angle to one other. Connect the two panels with Simpson Strong Tie – Model A21 brackets available at most home improvement store. (Figure 4) These brackets are used for deck and home construction, and are found with the lumber and deck supplies rather than the other hardware. The A21 brackets come in a 90-degree bend and must be spread for Triangular Grid connections or hammered completely flat for connecting a straight run of walls. Cut a 2×6 to a 120-degree angle and hammer the brackets to exact shape. Use a 1 5/8” coarse drywall screws placed in each bracket hole of the A-21 to attach the panels together. One bracket placed at ankle level and one above shoulder height make them less likely to scratch a patron.

Note: Simpson Strong Tie also makes a gusset plate, which is a tempting alternative to the A-21, but it is made of thinner metal, has more holes and sharp corners. The A21 bracket is the best choice for this connection because of its thickness, clipped corners and 4 screw holes.

Bracing
Once all of the panels are standing, you can add overhead bracing to the system for stability. Complete the grid where there are not panels using 8’ and 4’ 1x lumber, (1×3 or 1×4) with 1 5/8” drywall screws. An 8’ section should reach the edge of 3 panels, and be just a bit too short. Larger rooms may need 12’ lumber to reach clear across, or can be left open if the surrounding bracing is sufficient. Essentially you are creating a “truss” on its side across the top of the panels. When properly braced, you should be able to walk the pathway and see only 4’ triangles above.
The only thing needed to hold the panels to the floor is their weight. Doorways can be places in scare locations, to help secure the base of freestanding walls. The carpet also helps keep the panels stable. When installed correctly, the Triangular Grid System becomes one solid mass, where no one wall can move without the others moving as well.
Hopefully this article has shed some light on the mysterious, but “not as hard as it sounds” Triangular Grid System, While a proven alternative from a traditional square grid layout, the Triangular Grid System, it is not for everyone. Your facility may have certain characteristics (thicker wall panels, oddly shaped space, theme, local codes, etc.) that make it a less than ideal for the Triangular Grid System. If you must have square rooms, or wall panels that meet smoothly at every corner, then the Triangular Grid System is not for you. However, if the space saving characteristics, quick installation, disorienting corridor layout, smaller storage space, builder-friendly components and built-in scare opportunities are of interest to you, then you should implement the Triangular Grid System in the design of your next Haunted Attraction.

Nick Collins is a freelance set designer, scenic painter and life-long Haunt enthusiast based in North Carolina. He has designed and created custom scenery for numerous professional theatres, theme parks, entertainment venues and event firms throughout the Southeast. Nick can be reached by e-mail Seenickdesign@aol.com.